Monday, December 31, 2012

Farewell 2012...

2012 was a crazy year - maybe that's what everyone says at the end of a year, but I certainly do feel that way about the past one. The end of the year is always such a bittersweet time - looking back on past events (both good and bad), and looking ahead and setting goals.

Here are some highlights from the past year:


Starting in the upper left hand corner and going clockwise:
1. I bought my first baritone saxophone! I played one all through high school, but never owned one. I started playing in the community band again this summer - it felt great!
2. I learned how to shoot a gun this year. E and his dad helped me out a lot.
3. I "came out" as an atheist last January. This was a big step for me, and has really felt good.
4. E and I went to the Reason Rally in Washington, DC. This was my first trip to DC. It was amazing to be surrounded by so many people that believe the same way that I do.
5. This is just a picture of E & I that I really like. We were at Stone Park in Sioux City, IA.
6. Soggy Doggy - the pool had a fundraiser for the Humane Society where dogs could come swim at the pool. I had some moments geeking out over my fur-baby's first swim.
7. Autism Speaks Walk - my team raised over $13,000 for Autism Speaks! Amazing!
8. E & I volunteered for Spooky Science Night - a night that incorporated two of our favorite things - science and Halloween. Kids came through and learned about science and did science experiments, all the while in costume. It was an amazing time and I look forward to doing it again!
9. Adopt-A-Highway: Our secular group adopted a highway and it was very exciting when our sign was erected!
10. E & I attended a Nascar race in Kansas City in October. We usually go once a year, and it is such a great time. I can't explain the excitement and energy there is at one of these races.
11. A picture of E in DC. I think this photo is hilarious - it totally looks photoshopped, but it isn't!
12. Midwest Freethought Conference in Omaha - this is always a great time. E & I attended this in August.
13. I held a falcon! This might not seem like a huge deal, but I'm afraid of birds, so this was HUGE!
14. My niece, Zoey, was born. I love this little monkey!
15. Front and center - this is one of my favorite pictures of E & I. I think it shows how goofy and odd we are. :)

So that was 2012. With the end of the year comes planning ahead for the next year. Here are some things I plan to accomplish:

  • I want to cook more. I absolutely love cooking, and I want to branch out and try new things. I also want to cut down on eating out quite a bit.
  • I want to make our house more of a home, rather than just a place where we keep our stuff. This place needs to be E & M-ified - see my post about my home decor ideas here
  • I want to participate in the Sioux Glow 5K event. It's a 5K at night, where everyone decks out in glow in the dark gear!
  • As always, E & I hope to expand our family. However, with our difficulties, this does seem somewhat out of our hands, but we will do everything in our power to make this happen. I'm really hoping that 2013 is the year.
Here's to 2013! Cheers! <3 M

Saturday, December 29, 2012

Cheezy Hashbrowns... Nom, Nom, Nom!

Cheezy hashbrowns are such a staple here in the midwest - they work for breakfast, lunch, or supper! I've had good, I've had bad, and I've had ZOMG amazing cheeziness. These about do the trick for the latter.


Here's what you need:

1 lb Frozen Hashbrowns (thawed)
1 c. Sour Cream
1/2 can Cream of Chicken Soup
8 tbsp. butter
1 cup shredded mild cheddar cheese
1 cup cornflakes (crushed)
Salt & Pepper to taste

Preheat oven to 350 degrees. Combine 6 tbsp. melted butter with hashbrowns. Add in sour cream, cream of chicken soup, salt, pepper, and cheese.  Mix together thoroughly and pour into a casserole dish. Mix together the crushed cornflakes with the remained 2 tbsp. butter (melted). Top casserole and put in oven. Bake for 45 minutes.

And there you have it - ooey, gooey, cheezy, crunchy, yummy goodness. Enjoy!

<3 M

Friday, December 28, 2012

Kitchen Aid Cinnamon Rolls

The hubs knocked it out of the park with my Christmas present this year...

This is one hot piece of metal

Beautiful, right? The night that I got it I whipped up some orange cupcakes. It worked like magic. I've been anxious to try something else with it.

Homemade cinnamon rolls it is.

I've never made bread before (other than banana bread, which hardly counts). This should be interesting. I found a recipe at The E-Wife Blogs Again that was specially designed for using the Kitchen Aid and gave it a whirl.

This recipe has 3 parts - the dough, the cinnamon filling, and the icing. Here's what you'll need for the dough:

  • 3/4 c. milk
  • 1/2 c. sugar
  • 1 1/4 tsp. salt
  • 1/2 c. butter
  • 2 packets of active dry yeast
  • 1/3 c. warm water
  • 3 eggs, room temperature
  • 5 1/2 - 6 c. flour
Put milk, sugar, salt, and butter into a small saucepan and heat over low until the butter melts and the sugar dissolves. Remove from heat and let cool to lukewarm.

Dissolve the yeast in the warm water in the mixer bowl. Add butter mixture, eggs, and 5 c. flour. 

Using the dough hook, mix for 2 minutes on speed 2. The dough should cling to the dough hook and come away from the sides of the bowl. If the dough is sticking to the sides, slowly add more flour until it no longer is. Mix for an additional 2 minutes.

This is what the dough should look like - clinging to the hook, not the bowl.


Place the dough into a greased bowl, cover, and let rise in a warm place for 1 hour. 

Before

After 1 hour. Boom!


Now, you're going to want to mix up the cinnamon filling. You're going to need the following ingredients:
  • 1 c. brown sugar
  • 1 c. sugar
  • 1/2 c. butter (softened)
  • 1/4 c. flour
  • 2 tbsp. cinnamon
Mix on low until mixed thoroughly.


Roll the dough out on a floured surface into a long rectangle. Spread the cinnamon filling across the dough.


Roll the dough into a long roll. Pinch the end shut to seal the roll.


Using a piece of string, cut the roll into individual rolls. This should make 12-16 rolls, depending on how thick you cut them. Place rolls in a 9x13 pan, cover with a dish towel, and let rise in a warm place for 1 hour.

Once they've risen and are ready to bake, preheat your oven to 350 degrees. Put rolls in to bake for 15 minutes. You don't want to overbake these, because they'll dry out. While they're baking, whip up the icing. You'll need:

  • 4 oz. cream cheese, softened
  • 4 tbsp. butter, softened
  • 2 tsp. vanilla extract
  • 1/4 c. milk
  • 1 3/4 c. powdered sugar
Mix together until smooth. Ice rolls when they come out of the oven for maximum ooey gooeyness.

Sweet success!

Dig in and enjoy!

Lesson learned: Good cinnamon rolls can not be rushed - but ZOMG is it worth it!

<3 M


Wednesday, December 26, 2012

Home Decor Goal for 2013

I just hosted Christmas with my family yesterday, and it made me realize that my house is very... blah. Let's just say there are a lot of neutrals going on here. Which doesn't reflect my style at all - I love bursts of color, retro style, and artsy things. I've decided that one of my goals for 2013 is to really put some personality into our space and make it a relaxing haven for E and I, rather than just a place to put our stuff.

My biggest inspiration is the decor section of A Beautiful Mess. I am so in love with this blog - everything is so bright and feminine and adorable... seriously, check it out.

Here are 5 ideas I have to E&M-ify our place:


1. Paint furniture for a bright color pop. I have a rocking chair I'm planning on painting either a bright aqua or a mustard yellow.

2. Find a vintage chrome and formica dinette set.

3. Use bright printed fabric for fun curtains.

4. Paint a statement wall.

5. Find a bright vintage couch.

A lot of these will be found thrifting and rummaging - I guess I have something to look for now! 

I'm really excited about this project. I can't wait to make our house into a home.

<3 M


Monday, December 24, 2012

Glittery Blue Apocalyptic Jell-O Shots

It's been a few days - I have been busy celebrating the holidays with the in-laws over the weekend. Friday night, my friend hosted a Mayan Apocalypse Party. It was a blast, and although the world didn't really end, we partied like it was going to.

I made two things for the party: some fantabulous spinach dip (I'll share that recipe later) and glittery blue apocalyptic Jell-O shots. How did I arrive at glittery blue Jell-O shots for this party you may ask? Well, I sat there racking my brain for quite awhile to figure out a kind of Jell-O shot that made sense. For some reason, when I thought of an Apocalypse party, I pictured glittery blue or purple shots. I decided to ask a friend what kind of Jell-O shots she would bring to an Apocalypse Party. She said glittery blue ones. Hence, it was decided.

I didn't have any edible glitter on hand. I also live in a small-ish town where the chances of finding something like that aren't great. I checked Wal-Mart, Hy-Vee, and finally our party store. The party store had 2 similar options: cake shimmers and edible pixie dust. I picked up both in blue.

Now... into the kitchen to play with glitter, Jell-O, and vodka. :)

I boiled 1 cup of water (per the package directions) and dissolved the Jell-O in, according to the directions. Instead of the cold water, I added 3/4 cup of Vodka and 1/4 cup of cold water. If you're wondering about different Jell-O shot recipes, or how much alcohol can be added, I recommend checking out myscienceproject.org.

Now... the glitter. Hmmm...

I decided to try the cake sparkles first. I tried mixing them in right away, but as the solution was still hot, they dissolved right away. I decided to try letting the Jell-O solution thicken to a jelly consistency, then mix them in so they wouldn't dissolve and would be suspended in the Jell-O, rather than sinking to the bottom.

This kind of worked...


It kind of worked in that the sparkles were suspended throughout the mixture and didn't dissolve. However, they didn't look shiny once they were in the Jell-O, rather they just looked like blue pieces of... something. Also, the Jell-O shots that I made this way were lumpy on top instead of smooth once they had completely set.

For the second batch, I decided to prepare the Jell-O the same way, but pour it directly into the shot cups. Once they were set up, I took a paint brush and swirled the edible pixie dust on tops, creating a sparkling effect.


These turned out pretty well! They weren't my original vision (of glitter suspended throughout), but they were eye catching! I'll have to attempt suspending glitter in Jell-O shots again, perhaps when I have the time to really find some edible glitter. If anyone has had any luck in creating this effect, let me know.

Until next time...

<3 M

Wednesday, December 19, 2012

Coconut Toffee

Now that Nascar season is over, the hubs and I are at a loss for what to watch on a lazy Sunday afternoon. Usually we end up on Food Network - I like to cook, the hubs likes to eat; it's a win, win. One of the shows we really like is "The Best Thing I Ever Ate," which is basically a bunch of Food Network stars describing the best things they've ever eaten. For the holidays, they had them do a twist on it and share "The Best Thing I Ever Made" - but it was all holiday related. The hubs and I were watching and he saw Aarti Sequeira make "Coconut Toffee" and he was in love. I knew I had to attempt it.

Now this toffee isn't toffee in the way that we think of it. It is more of a sweet coconut candy, but hey - I didn't name it.

I found the recipe on foodnetwork.com and got to work.

Here's what you need:

  • Baking spray
  • 1 1/2 cups sugar
  • 1/2 cup water
  • 2 cups unsweetened desiccated coconut (also called finely grated)
  • Pinch ground cardamom
  • Drop pink food coloring, optional
Note: Ground Cardamom is expensive. Like $10 for a small bottle. But you could actually taste it, and I think it would be noticeable without it. I don't think that I've ever used another recipe that called for cardamom.

Spray an 8x8 square baking pan with the cooking spray and set it aside. 

Next combine the sugar and water in a sauce pan and heat over medium heat. This mixture is going to go through some textural stages and you're going to want to keep stirring it so the sugar doesn't crystallize along the sides of the pan. 


Cook until the mixture reaches the soft ball consistency or 235 degrees F on a candy thermometer. 


Unless you're magic, you're going to actually need the candy thermometer. On my first attempt, I thought I could just eye ball it - what resulted was a jelly mess that wouldn't set up. I went and got a $4 candy thermometer and the result was pink crystal perfection. Once it has reached 235 degrees, mix in the coconut, cardamom, and a drop of pink food coloring. Stir and pour into the baking pan, pressing firmly into the corners. If you've done it correctly, this mixture will immediately start to thicken.


If it sits there like a soupy pile (like my first attempt) then you didn't heat it to a high enough temp. Let your toffee harden (this takes a few hours), then cut into delicate little pieces and enjoy!


Overall, this recipe was simple, but attention to detail was necessary (the candy thermometer)! It was also really fun because watching the sugar and water solution go through different stages was like performing a science experiment. Also, the finished product looked just like the finished product on Food Network. Plus, the hubs approves. :)

<3 M


Tuesday, December 18, 2012

Simple Color Pop Picture Frames

Lately, I've been very into bright pops of color and contrasting colors. Color definitely perks up the place, and adding color is also a great way to give something old some new life. I've seen some adorable brightly painted picture frames at Hobby Lobby, however the price was definitely not adorable. I decided to create some of my own.

I started out with some ugly  picture frames that I had found on rummage sales. I'm pretty sure I paid 50 cents for the gold one and 75 cents for the other one. You'll want to find frames that have some carving or design imprinted on them.


Ugly right? :) 

I then took them apart - removed the back and the glass and spray painted the frames. I chose a bright aqua color. I didn't use a primer, and the paint on the frames has held up. I did choose the $5 spray paint over the cheapy 97 cent spray paint - in the past I've found that the cheap kind doesn't really cover  much of anything well.


Here's how they looked after the spray paint - the color is kind of washed out in these photos - it's much brighter in real life. I used 2 coats of spray paint on these.

After they've dried completely, add photos and enjoy!


I chose to use black and white wedding photos in mine. After doing these, I really want to do a variety of black and white photos in colored frames - I'm thinking a mustard yellow, hot pink, and orange! I'll definitely be on the lookout for more ugly frames at yard sales and thrift stores! You could also do chalk board or cork board in the frames. 

Simple, cost-effective, and adorable. Win, win, win.

<3 M


Friday, December 14, 2012

On Guns, Rights, and Responsibilities

Friday, December 14, 2012 marks a terrible day for our nation. The loss of so many innocents (the majority of which were children) is a tragedy.

I really should stay away from Facebook, because I just keep seeing things that piss me off. The majority of which are people that are blaming anything except anything to do with guns for this incident. And yes, I realize this may be more of a rant than anything, and it might be fueled by emotion. No one reads this blog anyway, so at least maybe it will make me feel a little better.

Let's be clear: I DO NOT want to take away people's guns. I enjoy going to the range and shooting. The big argument is that it is our right to bear arms. With any right comes responsibility. The lack of responsibility required with owning or using a gun is absolutely appalling. In life, when you want to do things, there are steps you need to take. There are licenses or certifications you need to get. Some examples:

  • If you want to purchase a car, you must license it and register it. 
  • If you want to drive a car, you must complete a series of tests to get a license. Once you have a license to operate a motor vehicle, you must also renew that license periodically.
  • I listened to a lecture from a falconer yesterday. You need a license to have a falcon and practice falconry.
  • If you want to drive a bus, you need a special license.
  • In Memphis, you need to purchase a $10 permit to panhandle.
  • Some city require permits for residents to hold a rummage sale. Some cities have limitations on how many rummage sales one person can have in a period of time.
  • Most cities require you to register your dog. We have to purchase new dog tags every year.
This list could go on and on... one obvious thing missing? Owning a gun. Really, all you need is some dough. If you go to a public dealer, you'll need to go through a background check (which, unless you're a felon, you're good). If you go through a private dealer, all you need is the dough.

WTF people? You have to go through more hoops to adopt a dog from a shelter - are you going to spay or neuter the dog? No? No dog adoption. Do you have a fenced in yard? No? No terrier adoption. A lot of shelters do home visits to ensure the dog is in a good home. 

There are public records of many things in a person's life - birth, marriage, death, titles, etc. But no gun registry. Why is that? Because Hitler did it, it's an invasion of privacy, (insert some other stupid reason), etc.

Do I want to take away guns in general? No. However I do think that in order to operate a gun, you should have to pass a gun safety course and get a license (much like learning to drive and getting a drivers license). I think that in order to own a gun, you should be mentally stable (to the best of anyone's knowledge), you should need to have a background check done (regardless of where said gun was purchased), and your gun should be registered with the state. Owning and operating guns should be no different than owning/operating cars. 

I'm all for people having guns - sane, mentally stable people that can pass a background check and don't purchase their guns at Wal-Mart.

<3 M

Sunday, December 9, 2012

Santa Maybe...

Today one of my friends posted on Facebook that they can't believe that people lie to their kids about Santa Clause. Their main point was that it is never okay to be that deceitful to anyone, at any age, so why is it okay to do that to your kids. Many people agreed with this post and said that they never did the Santa stuff with their kids. There was a lot of passive aggressive comments about how they are honest with their kids and don't want to teach their kids to be deceitful.

Although I see their point, the post made me really sad. The belief in Santa is such a magical thing, at least it was for me. I actually clung to the belief in Santa long after I knew the truth, because I wanted to believe it so badly. Losing Santa was like losing some part of my childhood. I never saw it as my parents lying to me, or being deceitful. Even at the time, I thought they were just trying to keep the magic alive, and they in turn asked me to keep it alive for my little sister. I was sad, because I wanted Santa to be real, but never once was I upset or mad at my parents about it.

I guess if I had never known about Santa, maybe I wouldn't have missed him. If my parents had raised me all along knowing that Santa is make believe, I wouldn't have experienced the let down when I found out the truth. I think I would have felt left out when my friends talked about Santa, and I probably would have spoiled that magic for them with the truth.

But I wouldn't have experienced the magic. I wouldn't have felt that excitement when Santa had eaten the cookies we left out, or took the carrots for the reindeer. I wouldn't have wondered how Santa could have possibly snuck in our house without anyone hearing him. I wouldn't have almost wet myself because I thought I saw Santa's sleigh and reindeer in the sky (while listening to the radio that was tracking Santa's movement), and I wouldn't have felt that thrill when Santa "accidentally" dropped one of our packages outside.

When the hubs and I have children, Santa will visit our house. We will leave out cookies and carrots, we'll listen for hooves on the roof, we'll write letters to the North Pole, and we'll listen to the radio and Santa's whereabouts on Christmas Eve. When it's time, we'll explain to our children that although we are the ones leaving presents, that Santa lives in everyone, spreading magic and Christmas cheer.

<3 M

Friday, December 7, 2012

Revamped Vintage Christmas Lights

A fairly productive stay at home day - some Christmas shopping, wrapped 12 presents, picked up my bonus check, paid 2 bills, and I revamped some vintage Christmas bulbs. I had seen this project on Pinterest and I decided to give it a try.

Here's what you'll need for this project:

Mod Podge, an old paint brush, glitter, vintage Christmas lights, and something to dry the bulbs on - I used a paper plate. I also have paper to try to contain the glitter mess. :)

I started out with some old vintage Christmas lights that I had laying around. These belonged to my grandma, and although I didn't want to part with them, I also didn't know what to do with them.


I started out by applying Mod Podge on the bulbs with the old paintbrush.


I then spooned glitter over the Mod Podge. Note: If the bulb is a different color than the glitter, you're going to have to go over some spots twice.


 Then I let the bulbs dry for a little while - this didn't take too long, maybe a half an hour.


I then put them in a jar, tied on a bow and enjoyed the new addition to my holiday decorating!


This picture doesn't do it much justice, but it really is cute in person (I promise)! Overall, this project was super easy, a bit messy, and the finished project actually resembled the finished product in the original tutorial. <3 M


Thursday, December 6, 2012

All I want for Christmas...

The hubs tends to forget to get my Christmas present until the 23rd or 24th. He's then rushed and ends up shopping in town, and usually ends up with a gift card or something that is maybe more of a gift for him than for me. I used to hint at things I liked, but eventually realized that was futile. I then started flat out telling him things I liked. However, he usually forgets. Back in the day though, he used to put quite a bit of thought into it and kind of rocked out in regards to gift giving. So here it is, my Christmas wish list... although I'm sure even this won't help.

1. Women's Columbia Bugaboo Jacket... b/c hey, it's freaking cold in South Dakota.


2. Kitchen Aid Stand Mixer (white)

3. Sexy Little Things Noir by Victoria's Secret


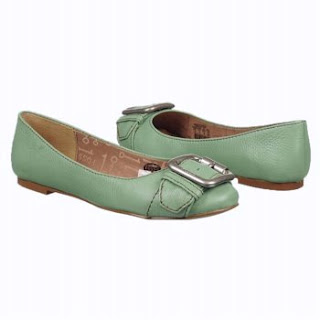
4. Mint Green Fossil Maddox Flats
5. Canon Powershot S110 (yeah, this one's not happening... spendy, spendy)

But honestly, I'd be just as happy with a hand written love letter and a day with his full attention. :)

<3 M


Tuesday, December 4, 2012

It's the Most Wonderful Time...

So, believe it or not, sometimes I do other things besides atheist related stuff. Especially now that it's Christmas time.

Wait... what? I'm an atheist - I can't celebrate Christmas, right? Wrong. I love this time of year. For some reason, I'm feeling especially Christmas-y this year. I don't know what it is this year but the songs sound better, the holiday smells are more aromatic, the Christmas tree is more magical, the lights are sparklier... even the hubs has caught the Christmas spirit this year (that Grinch's heart has grown 2 times bigger already this year). To clarify, I'm not into the baby Jesus stuff or any of that, but I enjoy the music, the baking, the gift wrapping, the decorating, and spending time with family. To be fair, most of the Christians I know don't really do anything different, other than dragging their ass to church on Christmas Eve. Oh, and make corny references to Jesus being the reason for the season. Wrong bitches - axial tilt is the reason for the season.

One of the things I love (and hate) about this time of year is the music. If it's done well, I'm aces and you'll find me singing and bopping along in no time. However, a lot of it is awful. Awful, awful, awful. Do you know what's not awful (and coincidentally is also one of the best Christmas albums I've heard)?

A Very She & Him Christmas


This album is fan-fucking-tastic. The combination of Zoey's vocals, the ukelele, and M. Ward's guitar = AMAZING. I've listened to this album 4 times in the past 24 hours. I'm sure I will be listening to it many, many, many more times before Christmas. Added bonus - it's a totally secular album. Check it out. Now!

<3 M